Step 1: Set Up the Scene
- Open Blender and delete the default cube (if it’s there).
- Go to Add > Mesh > Cube to add a new cube to start modeling the axolotl.
Step 2: Model the Axolotl’s Body
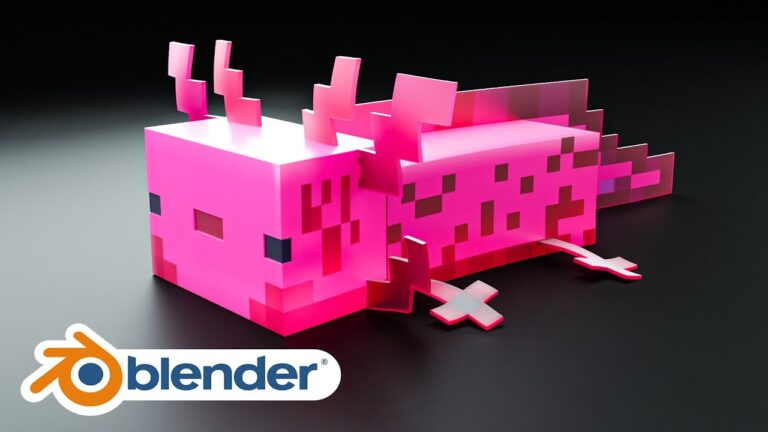
- Scale the Body: Scale the cube along the X-axis to create the axolotl’s long, rectangular body. You can adjust the dimensions to your liking or follow Minecraft’s approximate style.
- Duplicate for Head: Duplicate the body cube (
Shift + D) and scale it to create a slightly smaller cube for the head. - Position the head cube at one end of the body.
Step 3: Create the Legs
- Add a Small Cube for a Leg: Add another small cube for one of the axolotl’s legs.
- Scale and Position: Scale down the cube to make it rectangular and position it under the body near the front.
- Duplicate the Leg: Duplicate the leg cube three more times and position them for each leg. Two should be near the front, and two near the back of the body.
Step 4: Add the Tail
- Duplicate the Body Cube: Duplicate the body cube and scale it down to make a tail. Place it at the back of the axolotl, adjusting the length to your preference.
- Shape the Tail: Optionally, you can extrude or shape the tail to be slightly thinner at the tip for a stylized look.
Step 5: Create the Axolotl’s External Gills
- Add Small Cubes: Add small cubes on both sides of the head to create the iconic “feather-like” gills.
- Duplicate and Position: Duplicate and position them on either side of the head, and consider rotating each cube slightly for a natural spread.
- You can add additional small cubes in varying sizes for each gill to mimic the fluffy, frilly appearance.
Step 6: Color and Texture the Model
- Materials: Go to the Material Properties and create materials for each part of the axolotl (e.g., pink for the body, darker pink for the gills).
- Assign materials to each part individually, mimicking the pixelated style of Minecraft by keeping solid, unshaded colors without gradients or textures.
Step 7: Lighting and Rendering
- Add Lighting: Place an Area Light or Point Light above the axolotl to create a balanced light for rendering.
- Adjust the light’s strength to highlight the blocky, vibrant colors.
Step 8: Setting Up the Camera and Rendering
- Camera Position: Position the camera to capture the axolotl model from a good angle.
- Render Settings: Use Eevee for quick renders or Cycles for higher-quality, realistic lighting.
- Render the Scene: Adjust resolution and sample settings for the best quality, then render the image.


